Showing posts with label homemade. Show all posts

Wednesday, September 5, 2012

Pintrest Explosion!

Our dinning room has had empty walls basically since we moved in. I had a few things upbut they just did not seem to go well. Enter Pintrest to save the day!

Here is the room before. Just kinda bare. Nothing fancy. The lighting in this picture is pretty bad, sorry!


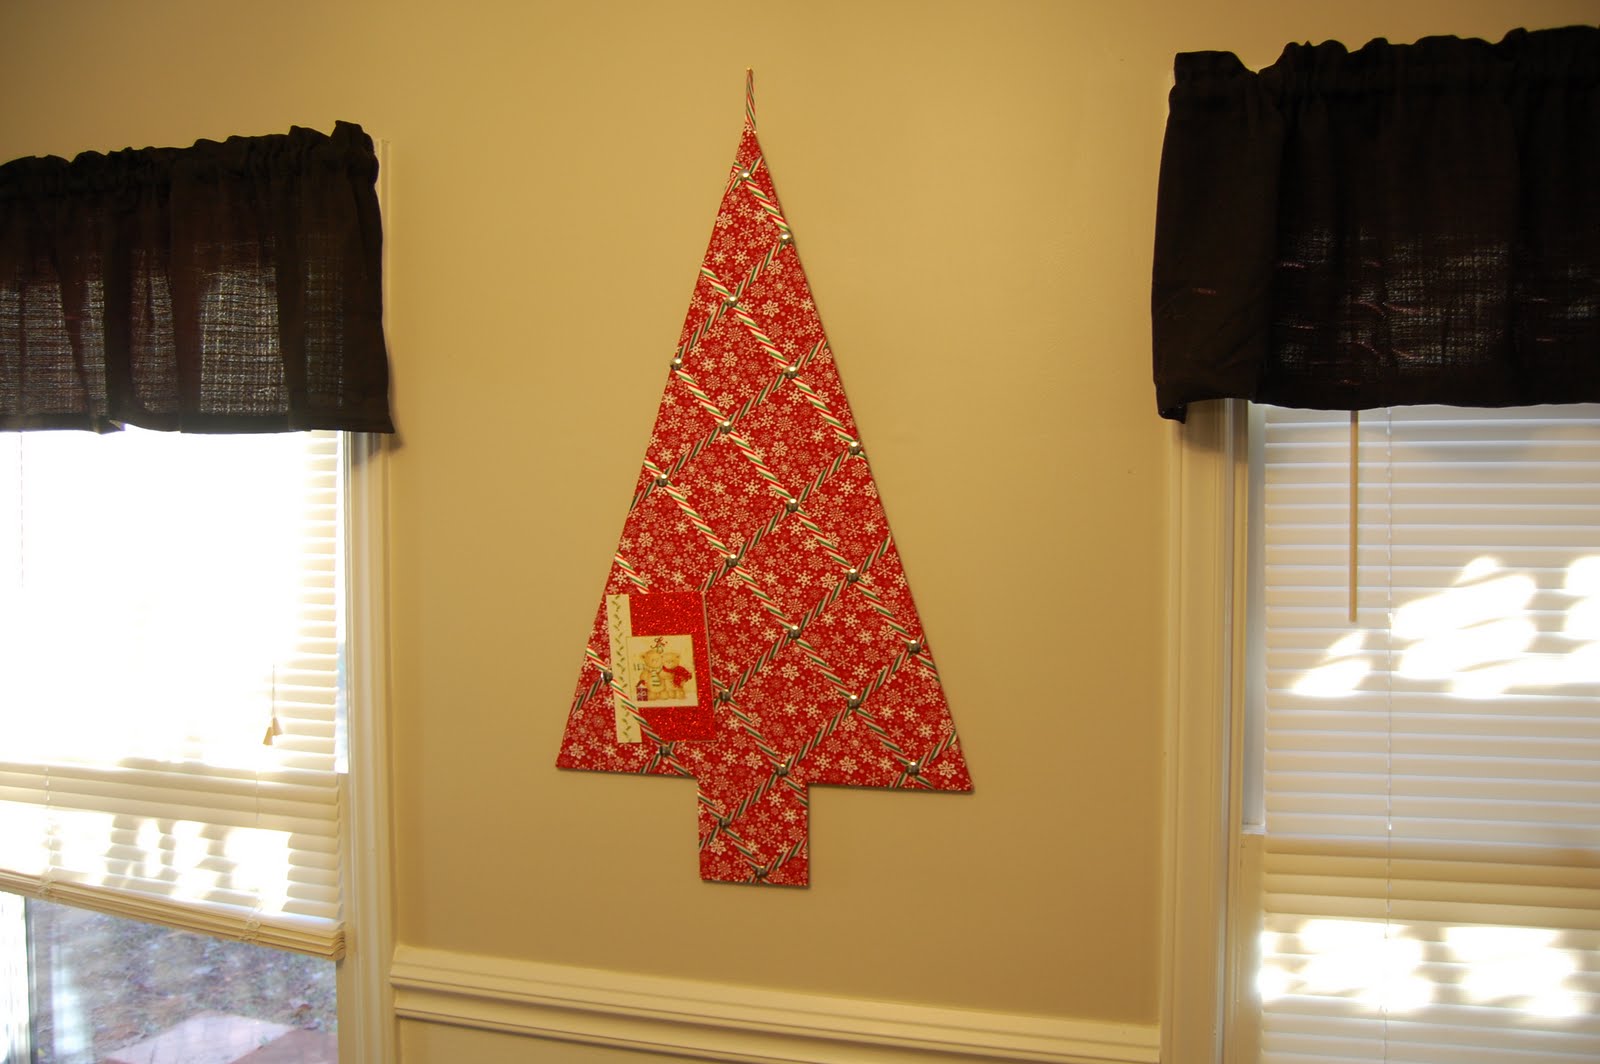
I loved this idea, and the kids had so much fun helping me with it! I have it hanging on that blank wall to the right of that window in the picture. It is actually between two windows, but you can only see the one in this picture.

Then I worked on our family Bible center. I got a random scrap of wood and pray painted it yellow, then put a decal on it that says "For the Bible tells me so". I took an old mirror I had and used chalkboard paint on it. Ta da! Now we can write verses on it that we are looking at together! It is right at our table which is perfect for family meal time. Oh, and yes I did make roman shades out of cheap mini blinds. It was super easy!

 And here is my precious niece, Miss Ella! Yep, I know, you cold just kiss that face all day!


Are you being brave and trying out things on pintrest????

Friday, April 27, 2012

Crafty And Surrounded By Pregnancy!

 Have I mentioned that there are like 70 pregnant ladies at our church? (that may or may not be a tiny exaggeration) I am surrounded by big bellies and new babies! And these two things make me want to sew. I have been sewing a lot these days.


I started off with nursing covers. Lots and lots of nursing covers. So easy to make! I can't believe people pay $30.00 for these things!


Then I fell in love with making taggie type blankets. Also incredibly easy and I love how personal you can make them.  


Then I got brave and tried my hand at a boppy cover. When I finished I thought I was something else! I was so proud of myself. I made it start to finish in 45 min! Then I looked on Etsy and realized that lots of other people are making these covers too. Oh well, it is still fun to make them as gifts. 


And last but not least, look at these kids? Aren't they precious! Makes me sad to see how big they look in this picture.


Tuesday, December 13, 2011

Christmas Fabric Wreath

I have really been busy making things these past few weeks. I go through phases where I just love doing projects and this is one of them. First I want to show you my fabric wreath that I made. All you need is a cut up pizza box and some fabric.


Trace your bowl and cut out a wreath shape.


Next I took a long scrap of white fabric to wrap around the cardboard ring first to give it some fullness.

After a few times of wrapping the fabric around I secured the fabric with a dot of hot glue. I went around the wreath twice with my white fabric because I had plenty and I wanted a nice full wreath.


Then, when I was done with the white fabric, I started with my Christmas fabric, using that same method.

And here is my finished project! I took some of my left over fabric and made a bow to tie on as well. You could really have fun with this project, making it all your own! Easy!

Oh and I made a table runner to match it.... and a hanging ball thingy to hang off the light fixture... I may have gotten out of control.... what can I say, I am finally hosting Christmas and I want it to look nice. The good news is I am not spending a fortune on pre-made decorations!

Thursday, December 8, 2011

Christmas Card Holder

In this house I realized we really don't have anywhere to really "set out" all of our Christmas cards this year. So I did some searching and found a quick, simple and frugal card holder I could make. Here is what I made!


I took one sheet of foam board, 1/2 yard Christmas fabric, Christmas ribbon and quilting tacks. I used packing tape to do the entire project, but a glue gun would have worked too. It was a very easy project!

*Cut out the tree form
*Cover tree in fabric (tightly)
*Crisscross the ribbon on the tree (tightly)
*Insert tacks at each crossing
*I also flipped it over after inserting the tacks and covered all the exposed tacks with a swatch of fabric, securing it with tape.

Ta-da! Done! How easy! I also thought it would have been neat to leave the foam board in a rectangular shape and made it look like a giant gift instead of a tree. No cutting the board then so that is an even easier option. I would say get some big fat ribbon to make a big bow for the top if you make it that way. Cute, cute, cute!

Who is feeling crafty?

Monday, October 31, 2011

Tie Onesie And Tangle Spray

So Charlie has been gone for about a week and I am trying to find things to do to keep myself from going nuts! I have been recycling tons of things around my house to help with the before mentioned issue. Today I made Jayce a pillow case out of an old changing table cover and it turned out great! Why buy fabric when there are tons of reusable things around the house?

After that I made my own tangle spray for Lula Mae. With her curly hair it is a must! I took my old empty bottle of tangle spray and gave it a good rinse. Then I filled it up with water and added two small squirts of conditioner. After giving it a good shake it was ready to go. Just that easy!


The last thing I made tonight was a cute little onesie for Jayce. I took an old t-shirt and made a tie with some of the scraps. I sewed them on and ta-da, an outfit perfect for my handsome boy! I can't wait for him to wear it to church on Sunday!

Later this month I am going to tackle recovering the dining room chairs, if the budget allows. Quality fabric is not cheap and I do feel like I need good quality fabric for this job. I will be sure to post pictures when I get around to that!

Monday, October 17, 2011

Dear Goodness I Just Can't Stop!

I just can't stop crafting! Everyone out there in bloggy land has given me the bug! Lately I have been working on fabric flowers. I want to use them to embellish some pillows for the playroom so I need to practice them. To practice them I decided I would make a few headbands. Here is the first one I made.


My technique was not that great on this one, plus I made it bigger than expected.


To make the band I cut my fabric strips and braided them. I left the ends long so that it could be tied and worn that way. Then I attached the flower to the band.


Here is the thing.... I don't accessorize. Like, at all. If I am going to wear earrings I have to put them on and then not look at myself in the mirror. So when I saw this big thing on my head I was just not happy. I was happy with the headband, just not on me. So I gave it to my sister, because she is someone who accessorizes.

So here is my latest flower. It is much neater and my technique is better. I made it smaller because I did want a headband for myself. This time I took a headband and wrapped it with my fabric, securing it with hot glue. Lastly I attached my flower.


This one is much more my size. I am pretty happy with how this one turned out! Plus the orange is very fall :-)


People, if you stand still too long at my house I just may turn your shirt into a fabric flower then use your pants to make you a headband with it!

Monday, October 10, 2011

DIY Bow Holder From Clay In His Hands

A few days ago my friend Sarah from Clay In His Hands posted a great DIY project. Not only is it a DIY project but it is one most people can do for little to no money spent! How great is that? Anyway, let me show you what I made, thanks to Sarah :-)


I started with an old picture frame (that I already had)


Then I spray painted it white (with spray paint I already had)


Then I wanted to go buy some ribbon. Instead I thought "what would Sarah do?" and well Sarah is one of the most frugal people around and she would dig and dig and dig in her craft box and find any ribbon and be content with it. So I did. I dug and dug and dug. And I found some ribbon!


Well I found some ribbon and rickrack. And magically they are perfect for Lula Mae's Disney room!


After my frame dried I placed my ribbon and got my glue gun ready.


I used an old coaster to help me secure the ribbon snugly to the frame.


This is my finished product! The ribbon was not perfectly straight, but that is the beauty of homemade.


Lula Mae has a few bows.... we like bows okay.... even when we hang out in our footie pajamas we like bows....


And it wouldn't be me if I didn't throw in a crazy amy-trying-to-be-artsy-photo :-)

This project cost me nothing and I am really pleased with it. Sarah is quite the crafty one and can always do it while pinching her pennies. I love that she finally pushed me to do a project!

I have a birthday gift I am going to be working on soon and I can't wait to share it with you too! How awesome are homemade gifts?!

Friday, July 8, 2011

Inexpensive Accessories

I don't wear earrings often. My ears have always been super sensitive and get infected very easily. I have never been one to keep earrings in all the time, I put them on for a reason and then take them off at the end of the day (or as soon as I get home from whatever it was that caused me to put them on in the first place!) Lately I have been feeling very unattractive. I am not the most dolled up person and I feel a little bad for Charlie. I don't enjoy shopping or spending money on myself so I wanted to find a cheap fun way to acquire some new bling. I went to our local craft store and bought a pack of hoops. Then I looked around for some cute buttons. What I love is that in one pack I got 3 options of earrings. Plus, the buttons were only $2.30! I like the small buttons myself, but I could switch out to the large ones for a special outfit. They also looked really good layered.

So if you are looking for a cheap way to dress yourself up for your next date night, head to your local craft store and find some buttons!

Sunday, June 12, 2011

Homemade Play Dough

Lula Mae and I recently made our own play dough. Not only was it homemade, but it was edible! Charlie was worried. He said that it would confuse her and make her think you could eat play dough. I assure you that Lula Mae is to the point where she does not "eat" things. She never really did actually. She told us several times about the little boy in Sunday school who ate play dough and how she told him you weren't suppose to (oh boy, Lula Mae is gonna be one of "those" kids... grand...). Since she was able to repeatedly tell me why we don't eat play dough I decided to go ahead and make it. FYI if you have a child who does tend to eat things like play dough, you may want to hold out on this craft for a while just so you don't confuse them.


Play Dough

- 1 Cup peanut butter
- 1 Cup honey
- 1.5 Cups dry milk
- 1.5 Cups powdered sugar


It's simple! Just stir all the ingredients together until well incorporated and you are done! I do think it is best for it to sit in the fridge for about an hour before playing with it though. That helps it set up a little. You can store this in the fridge for roughly a month. This recipe makes a lot so you will have plenty to nibble and play with :-) Lula Mae really enjoyed it!


Wednesday, April 13, 2011

For My Soon-To-Be-Three-Year-Old

I wanted Lula Mae to have something special to wear to her birthday party this year. So I made her a tutu! I looked into buying one and could not believe how over priced they are. I spent about $5.00 total on my supplies and was able to start and finish this in about an hour. It was sooooo easy! I didn't have to use my sewing machine either. I am not kidding, I may start making these and selling them on Etsy or Ebay. Food for thought at least. She will be sporting this cute little thing a lot I'm sure. She hasn't seen it yet, but when she does, she is going to be in love! Even though she loves her Bass Pro Shop shirt and adores playing in the dirt and searching for bugs... she is very much a girly girl at heart. She is a very well rounded gal ;-)


Don't worry, I will be back with pictures of my soon-to-be-three-year-old wearing her new tutu before you know it!

Thursday, March 25, 2010

A Nursery For Two!

Well, the nursery is done! And I was right... I was quite sad seeing Lula Mae's pink painted over. All for a good reason though... a new life! I am thrilled with how the nursery turned out! It really is better than I pictured in my mind when I dreamed it up. Lula Mae loves the fact that Jayce's name is on her wall.... not that she understands that it means he will be sharing her room, but at least she is excited about it, right? The pictures do not do it justice! Check out the new nursery!

And the work begins!
Goodbye pink walls :-(
Jayce's Side
Lula Mae's Side

Split down the middle!
Joshua 1:9 is above the changing table
Like I said, the pictures just don't do the room justice! It is beautiful! Painting the frames about the kids cribs were so much harder than I expected! I am so glad they turned out as good as they did because when I first started them they looked terrible! The valance above the window I made. I went out and got some cheap white fabric and ribbon and sewed it up in about 30 minuets. I was not going to spend $20.00 on a white valance when I could make one for $5.00! It is one of my favorite pieces in the nursery I think! I also ordered those space saving hangers for the closet off of ebay for $5.00 shipped. They have really tripled the closet space! They are great! We have very small closets so any help in that area is fantastic! I can't wait to see how the room functions for 2! Jayce will be here before we know it!

Tuesday, February 16, 2010

Starting On The Nursery


This is the first thing I have done for the nursery and I love it! This is the sign that will hang on the door. I got a plain piece of wood from Lowe's and painted it myself. Then I added the decal that I bought off of Etsy (I found a lady who sells decals for $1.00 a word!!!). Lula Mae and Jayce are going to be sharing a room for a while so I had to come up with a neutral theme. I did not want to do yellow or green with animals or anything like that. So, I decided to go with gray as the room color with light pink accents on her side and light blue accents in his side. The furniture is white so I thought that white lettering throughout the room would be a nice touch. I am going to do each of their names above their cribs in white and also a bible verse above the changing table in white. I can't wait to see the finished product. Although, I am going to be sad painting over Lula Mae's pink walls. I can remember picking that paint color out with Charlie and working so hard on her nursery to make it a special place for her. It really feels like just yesterday we brought her home... but in just 3 months she will be 2 years old. I should be thrilled (and deep down I am) to see her growing and changing, but I am also sad to see her as a "big girl". I really don't know when she changed from "baby" to "toddler"... I blinked and missed it I guess. So getting started on the nursery has been a little emotional, but it is also very exciting! It is the start of a new chapter for our family! I will post pictures as soon as we get more work done on Lula Mae and Jayce's room!


*This is just my artistic picture :-) I like that the word "prayed" is the word in focus... I thought it was pretty!

Thursday, February 11, 2010

Diaper And Wipe Case

Yesterday I felt the urge to get crafty. I love to sew! It is so nice to take a piece of nothing (fabric) and turn it into something! I have always wanted one of those diaper and wipe pouches for the diaper bag, but couldn't get myself to spend the money for one. So I finally made one. I made mine much larger than the ones that they sell (I wanted to be able to fit more than just one diaper and some wipes in it!) plus I added a handle so it can be hung in a public restroom. I like the idea of being able to put all of Lula Mae's bathroom necessities in this and grab it out of the diaper bag to take her to be changed, instead of lugging the entire diaper bag in there and having no where to put it! Plus Lula Mae won't need a diaper bag much longer, but Jayce will. I wanted to be able to put Lula Mae's things in the diaper bag too without things getting messy and cluttered. I have to say that I love to sew, but I am not very good. I would never try to sell this to someone because there are several obvious flaws. I have to admit that when I sew I don't use patterns. I cut out my pieces and figure out how to make it on my own. I like it that way. It is like a puzzle and works my brain. Anyway, enough about all of that! Here are some pictures of my finished product. I thought it turned out pretty good!


Total cost of my project: $7.32
Price of a diaper and wipe case on ebay: $19.99 plus $4.00 S&H

I saved $16.67! Take that ebay :-)

Monday, January 4, 2010

Burp Clothes

When Lula Mae was born a co-worker of mine gave us 6 beautiful burp clothes. Some with her name on them, some with her monogram and some with different things embroidered on them. They were so personal and gorgeous! Since I don't work at the YMCA anymore I decided I would try to make some cute burp clothes for this baby myself. I am not totally happy with the results, but I am my own worst critic. These don't look HALF as cute as Lula Mae's did, but this was my first try at this.


These three are done. I sewed ribbon border on 3 more and want to have them monogrammed. Unfortunately I don't have a machine that can do fancy things like that! I hope to save up for one in a few years though! I will post pictures of the others when I get them back.

Wondering what the "J" stands for? Well, I am going to make you wait just a few more days to find out! I will do a birthday post on January 12th that will tell what our little boy is going to be named and why! Stay tuned!

Yummy!

Yesterday I made Charlie and I a treat, Peanut Butter Balls courtesy of Sarah from Clay In His Hands. They were so easy and inexpensive to make! "Easy" and "inexpensive" mean they will be a favorite around here! Well, me being pregnant and a huge lover of chocolate I took all the healthiness out of these yummy treats (Sorry Sarah!). Yes, I covered the tops in chocolate! It is like eating a Reese Cup! So yummy and still a little bit healthy... right? Thanks Sarah for the recipe! I hope you will give them a try sometime! Enjoy!


Saturday, December 19, 2009

Laundry Detergent

Today I embarked on a money saving, environmentally friendly project that I have wanted to do for a while... I made my own laundry detergent! Yep! I am very excited about this project and can't wait to do some laundry tomorrow! It was so easy and inexpensive to make... and that thrills me! This is just one more step that will help Charlie and I get closer to our goal of being financial free! Praise God! I really encourage you to try this out and see if you like it! Anything is worth a try when it comes to saving money. If you don't like it you will only be out about $13.00 so you won't have a huge loss there. Okay, here is what you will need to get started:


*Cheese grater, a bar of Ivory soap, 100% sodium carbonate (NOT SODIUM BICARBONATE), borax and a food processor (not pictured)

Here is the recipe that I used:
*1 bar of soap
*1 cup sodium carbonate
*1 cup borax

Measure out the sodium carbonate and borax, mix together in bowl. Grate bar of soap and add to mixture. Put mixture into food processor and blend until soap is powder consistency. Store in an air tight container. Use 1 tablespoon for regular size loads or 2 tablespoons for larger, heavier soiled loads.


My Finished Product!


I made a double batch just to save myself the trouble of making it again in a few weeks. I love bulk! I love the smell of this detergent! It reminds me of being a little kid because we used nothing but Ivory soap growing up! The total cost per batch of this detergent is $2.50! Each batch should wash roughly 65 to 75 loads!

Here are a few things that you may want to know before you get started:

*The purple and white bottle above (sodium carbonate) is a substitute for Arm and Hammer Super Washer Soda. I was unable to find the actual Arm and Hammer brand but they are the exact same thing.
* I used Ivory soap because I love the smell, but here are some alternatives: Fels-Naptha, Zote, Kirks Hardwater Castile. Don't use heavily perfumed soaps.
*Washing Soda and Borax can usually be found on the laundry isle of many stores.